What is NgRx?
NgRx is a powerful state management library designed specifically for Angular applications. In front-end development, state refers to the data and its structure used to represent the current state of the user interface. Managing the state in complex applications is crucial, and NgRx plays a vital role in state management. By adhering to the principles of Redux, NgRx utilizes concepts such as effects, actions, reducers, selectors, and states to handle and modify data in a structured manner.
How NgRx Empower Developers?
To uphold a robust structure in the application development process, especially when dealing with complex applications, it is advisable to elevate it to a higher level of abstraction. By leveraging NgRx, developers can elevate their projects to a higher level of abstraction, enhancing overall efficiency. This tool is invaluable when establishing communication between components operating in varied states, facilitating the seamless transmission of data from one component to another. Embracing NgRx enables developers to streamline complex processes and ensure a more cohesive development workflow.
The Core Principles of State Management
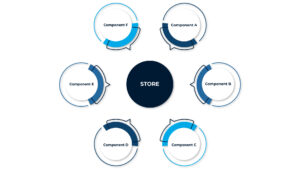
- Single Store: The State of an application should be stored in a single state. The store is responsible for sending data from store to component not from component to component.
- Read-only State: The State should be immutable or read-only. To change the state a new action should be triggered or emitted.
- Reducers (Pure functions): Reducer takes the current state and an action, and returns the new state.

Simple representation of how data flows from store to component instead of component to component.
Installation:
Below is the list of commands used for the installation of NgRx.
- npm install @ngrx/store –save
- npm install @ngrx/effects –save
Steps to Create Store and Consume API Data Effectively
Step 1: Create a folder as +state
- We create a folder named +state to ensure it represents the NgRx store and its related files.
- Inside the +state folder, create four files: sampleStore.Action.ts, sampleStore.effects.ts, sampleStore.reducer.ts, and sampleStore.selector.ts. Instead of a Sample store, we can use our related file or module name.

Step 2: Create another folder as types
- Inside the types folder, we declare the type of data coming from API and name that type related to our component or functionality. For example, if my functionality name is data list I’ll name it dataList.type.ts

- We have one more file inside the types folder, which is state.ts. Inside the state.ts file, we define the state for all type.ts files used in the reducer for the initial state to ensure the right data is returned.


Step 3: Create a service file
- In the service file, list APIs used with details such as name, endpoint URL, HTTP method, brief description, key request parameters, response formats, headers/auth.

Step 4: Create actions
- Create 3 actions, one to invoke the API, the second to return API success data, and the last to return an error message if the API fails.

Step 5: Create a selector
- We need to create a selector to make sure which API data we need to fetch and it’s type as defined in the state.ts file

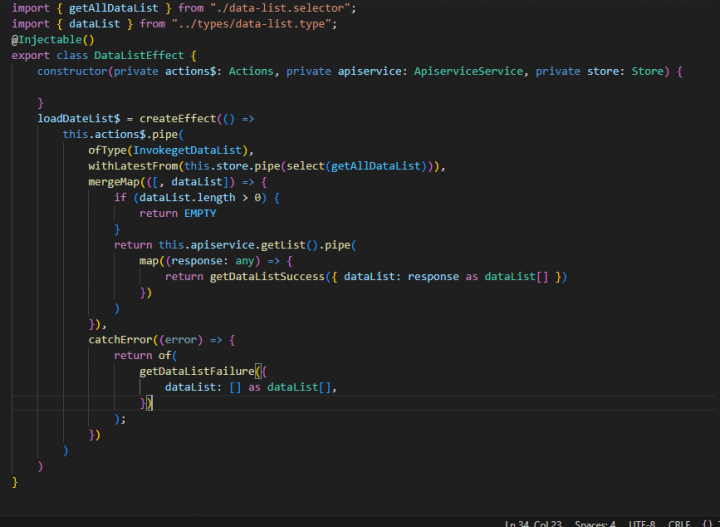
Step 6: Create effects

Step 7: Create a reducer
- Reducer takes the current state and action as an argument and returns a new state

Step 8: Create a Local Storage Sink
Define the created state and reducer in the module.ts file to preserve data during a refresh and access data from the store.

- The localStoreSyncReducer function synchronizes the NgRx store with local storage, ensuring that data persists across page refreshes.


Good information Ganesh.