
What is Power Apps?
Power Apps is a comprehensive collection of apps, services, connectors, and a data platform that offers a fast and efficient environment for creating custom applications tailored to your business requirements. By leveraging prebuilt templates, intuitive drag-and-drop features, and quick deployment options, your team can craft custom business apps effortlessly. It offers rich business logic and workflow capabilities that help convert your manual business processes into digital, automated ones.
Responsive Power Apps
Responsive power Apps appear great on tablets, PCs, and smartphones and are created completely with a responsive design.
The horizontal container and the vertical container are the two controls that have the ability to be automatically arranged. We must disable the scale-to-fit option in the display option settings of responsive Power Apps.
Multilingual Power Apps
PowerApps multilingual application is a flexible platform that allows users to seamlessly switch between languages, enabling them to interact in their preferred language. It’s user-friendly design and functionality also facilitate smooth navigation in the app using the language of choice.
Step 1:
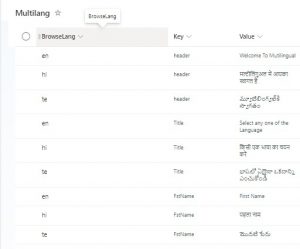
Make a list in SharePoint with three columns: Value, key, and browser language.
We must add the same key for each label/text input in the SharePoint list and add some unique key for each and every label/text input.
Here, we are translating the languages – English, Hindi, and Telugu using a Google Translator.
Ex: Browsed Language en which is english
Key – As it is a header part, I inserted the key as the header
Value – Welcome to the Multilingual App
Step 2:
Includes a header container, main container, and footer container.
In the footer container, insert a label and add it as a text property. So, the current user email will be displayed in the footer container whenever the user logs in.
![]()
Step 3:
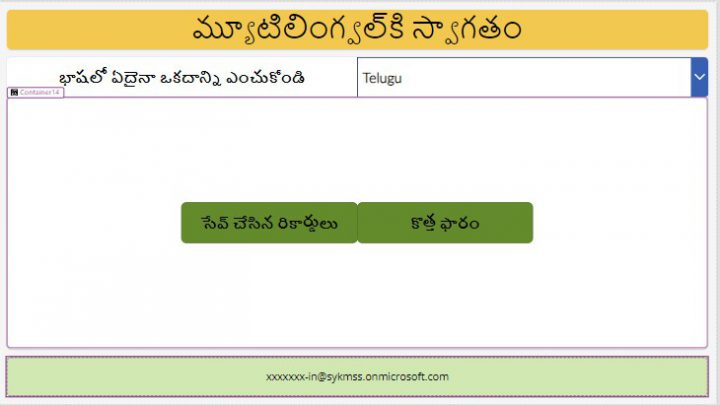
Label the header container with labels and add its unique key to change its language based on the drop-down value selected and insert the line of code in its text Property.
![]()
Step 4:
In the main container, add a horizontal container and reorder to the top of the main container to insert a drop-down and its label.
Step 5:
Insert a drop-down in the horizontal container, and add desired languages in the items property.
![]()
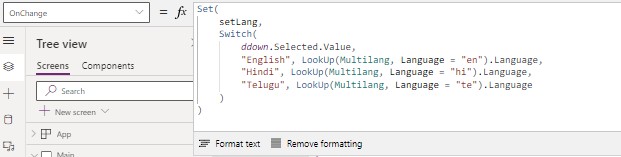
Step 6:
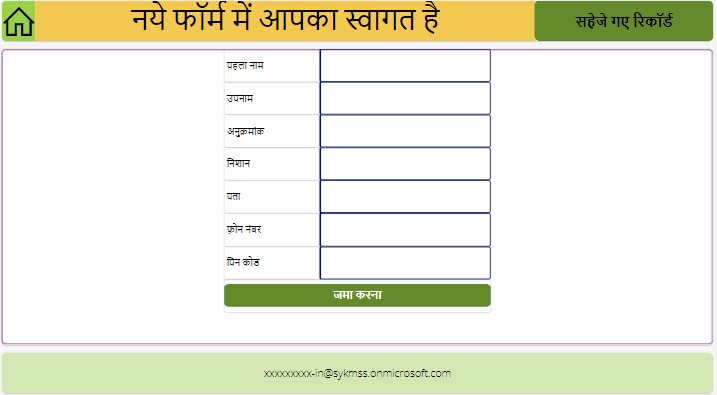
In an Onchange property of the drop-down, it is necessary to assign a variable and implement a switch condition based on the drop-down selected value. This will result in the entire form being displayed in the specific language of the user’s choice.
Step 7:
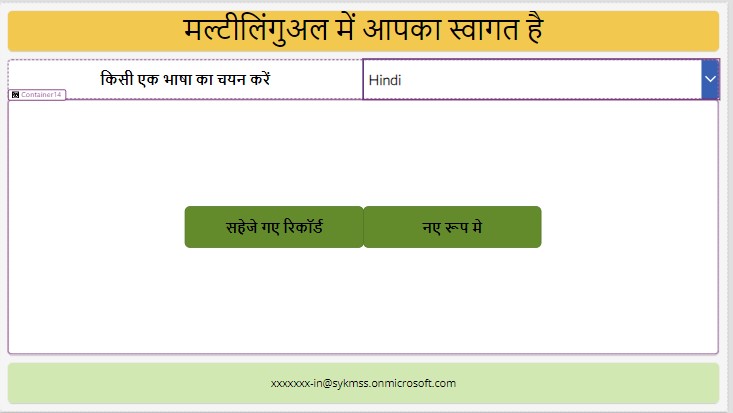
Add two buttons for the saved records and the new form. Whenever the user clicks on the saved records button, then the user should navigate to the saved records screen. And when clicking on the new form button, the user should navigate to the new form screen.
In an Onselect property:
![]()
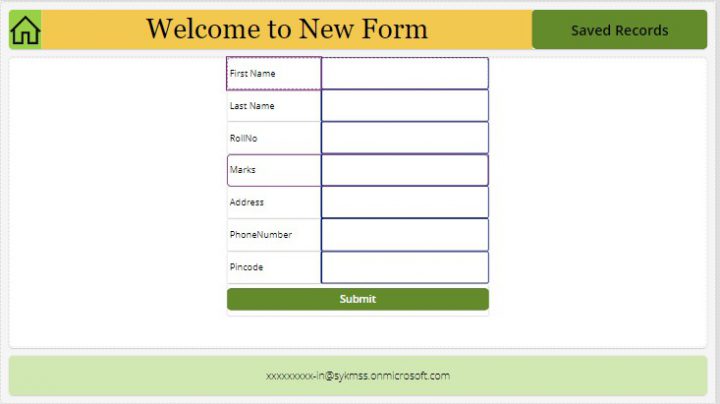
Step 8:
In the new form screen, add a new header, footer, and main container screen where the user can insert their data. In the main container, add a horizontal container and text labels and the text inputs based on the number of fields provided in the SharePoint list.
Step 9:
Add a lookup function for all the text labels based on the key provided for the label.
Here is one of the lookup fields for the first name.
![]()
Key = “FstName” && Language = setLang: This is the condition you specify. You are looking for a record where the “Key” column is equal to “FstName” and the “Language” column is equal to the value stored in the setLang variable.
- Multilang: This is the name of the data source.
- Key : “FstName” && Language = setLang:
We are looking for a record where the “Key” column is equal to “FstName” and the “Language” column is equal to the value stored in the setLang variable.
3. Value: This is the column from which we want to retrieve the value once the record is found.
Step 10:
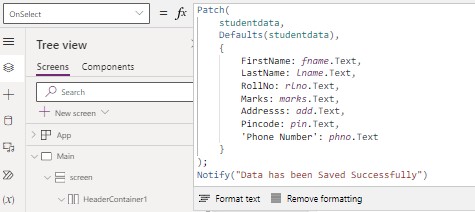
Add a button to save the data in the data source which is the SharePoint list. So, we should write a patch function to save the data.
- student data: The data source we want to modify.
a. defaults: The record to be updated. In this case, it’s creating a new record based on the default structure of the student’s data source
b.{ }: The set of changes we want to apply to the record. In this case, it’s updating various fields (FirstName, LastName, RollNo, Marks, Address, Pin code, ‘Phone Number’) with the values entered in corresponding text input controls (fname.Text, lname.Text, rlno.Text, marks.Text, add.Text, pin.Text, phno.Text).
c. Notify: Triggers a notification in the app, displaying “Data has been Saved Successfully” to inform the user that the data update or addition was successful.
Step 11:
Insert a new button to view the saved records, and based on the drop-down value selected, the text will be translated. Also, we need to navigate to the saved records gallery so insert Navigate (Savedrecords screen) in an Onselect property.
![]()
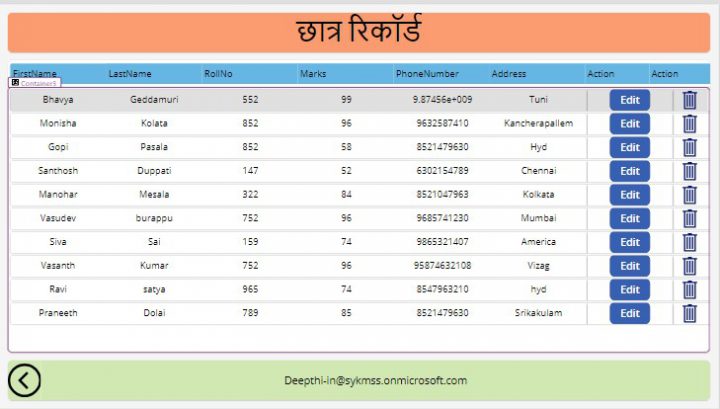
Step 12:
Insert a new screen to view the saved records as a gallery view. When the Saved Records button is clicked by the user, they will be directed to the saved records gallery.
Conclusion
Creating responsive power apps involves developing the application and ensuring it adapts to different screen sizes and orientations. The main features of responsive apps include adaptable designs, anchoring controls, managing orientation changes, and font size adjustments. By incorporating these elements, developers can create user-friendly Power Apps that are visually appealing across devices and orientations.